My MITM/Sniffing Station
The humble MITM/sniffing station. There might not seem like a lot to it, but it certainly does the job.
In this blog post, I will cover how I've set up some gear for the purpose of performing MITM attacks to test operating systems, applications, but mainly phone apps. I'll cover how to configure things as well as different software packages I use - all of them freeware and/or open source.
Why have such a setup? It is one thing to suspect that your new phone app is being evil and phoning home with your personal data - it's another to have absolute proof. This gives you the means to do just that.
The Basics
On the laptop, the idea is this - set up one interface to talk to the Internet, set up another to act as an ad-hoc network, and make the traffic pass through the interfaces where you can intercept it. Simple, right?
Not so fast. Just getting two interfaces running on the same system is a challenge, especially if one is built in. Getting both of them to pass traffic while one is a wireless ad-hoc network can be utterly frustrating. The easiest thing to do is to plug in an Ethernet cable into the laptop, and use its wireless interface as that ad-hoc network.
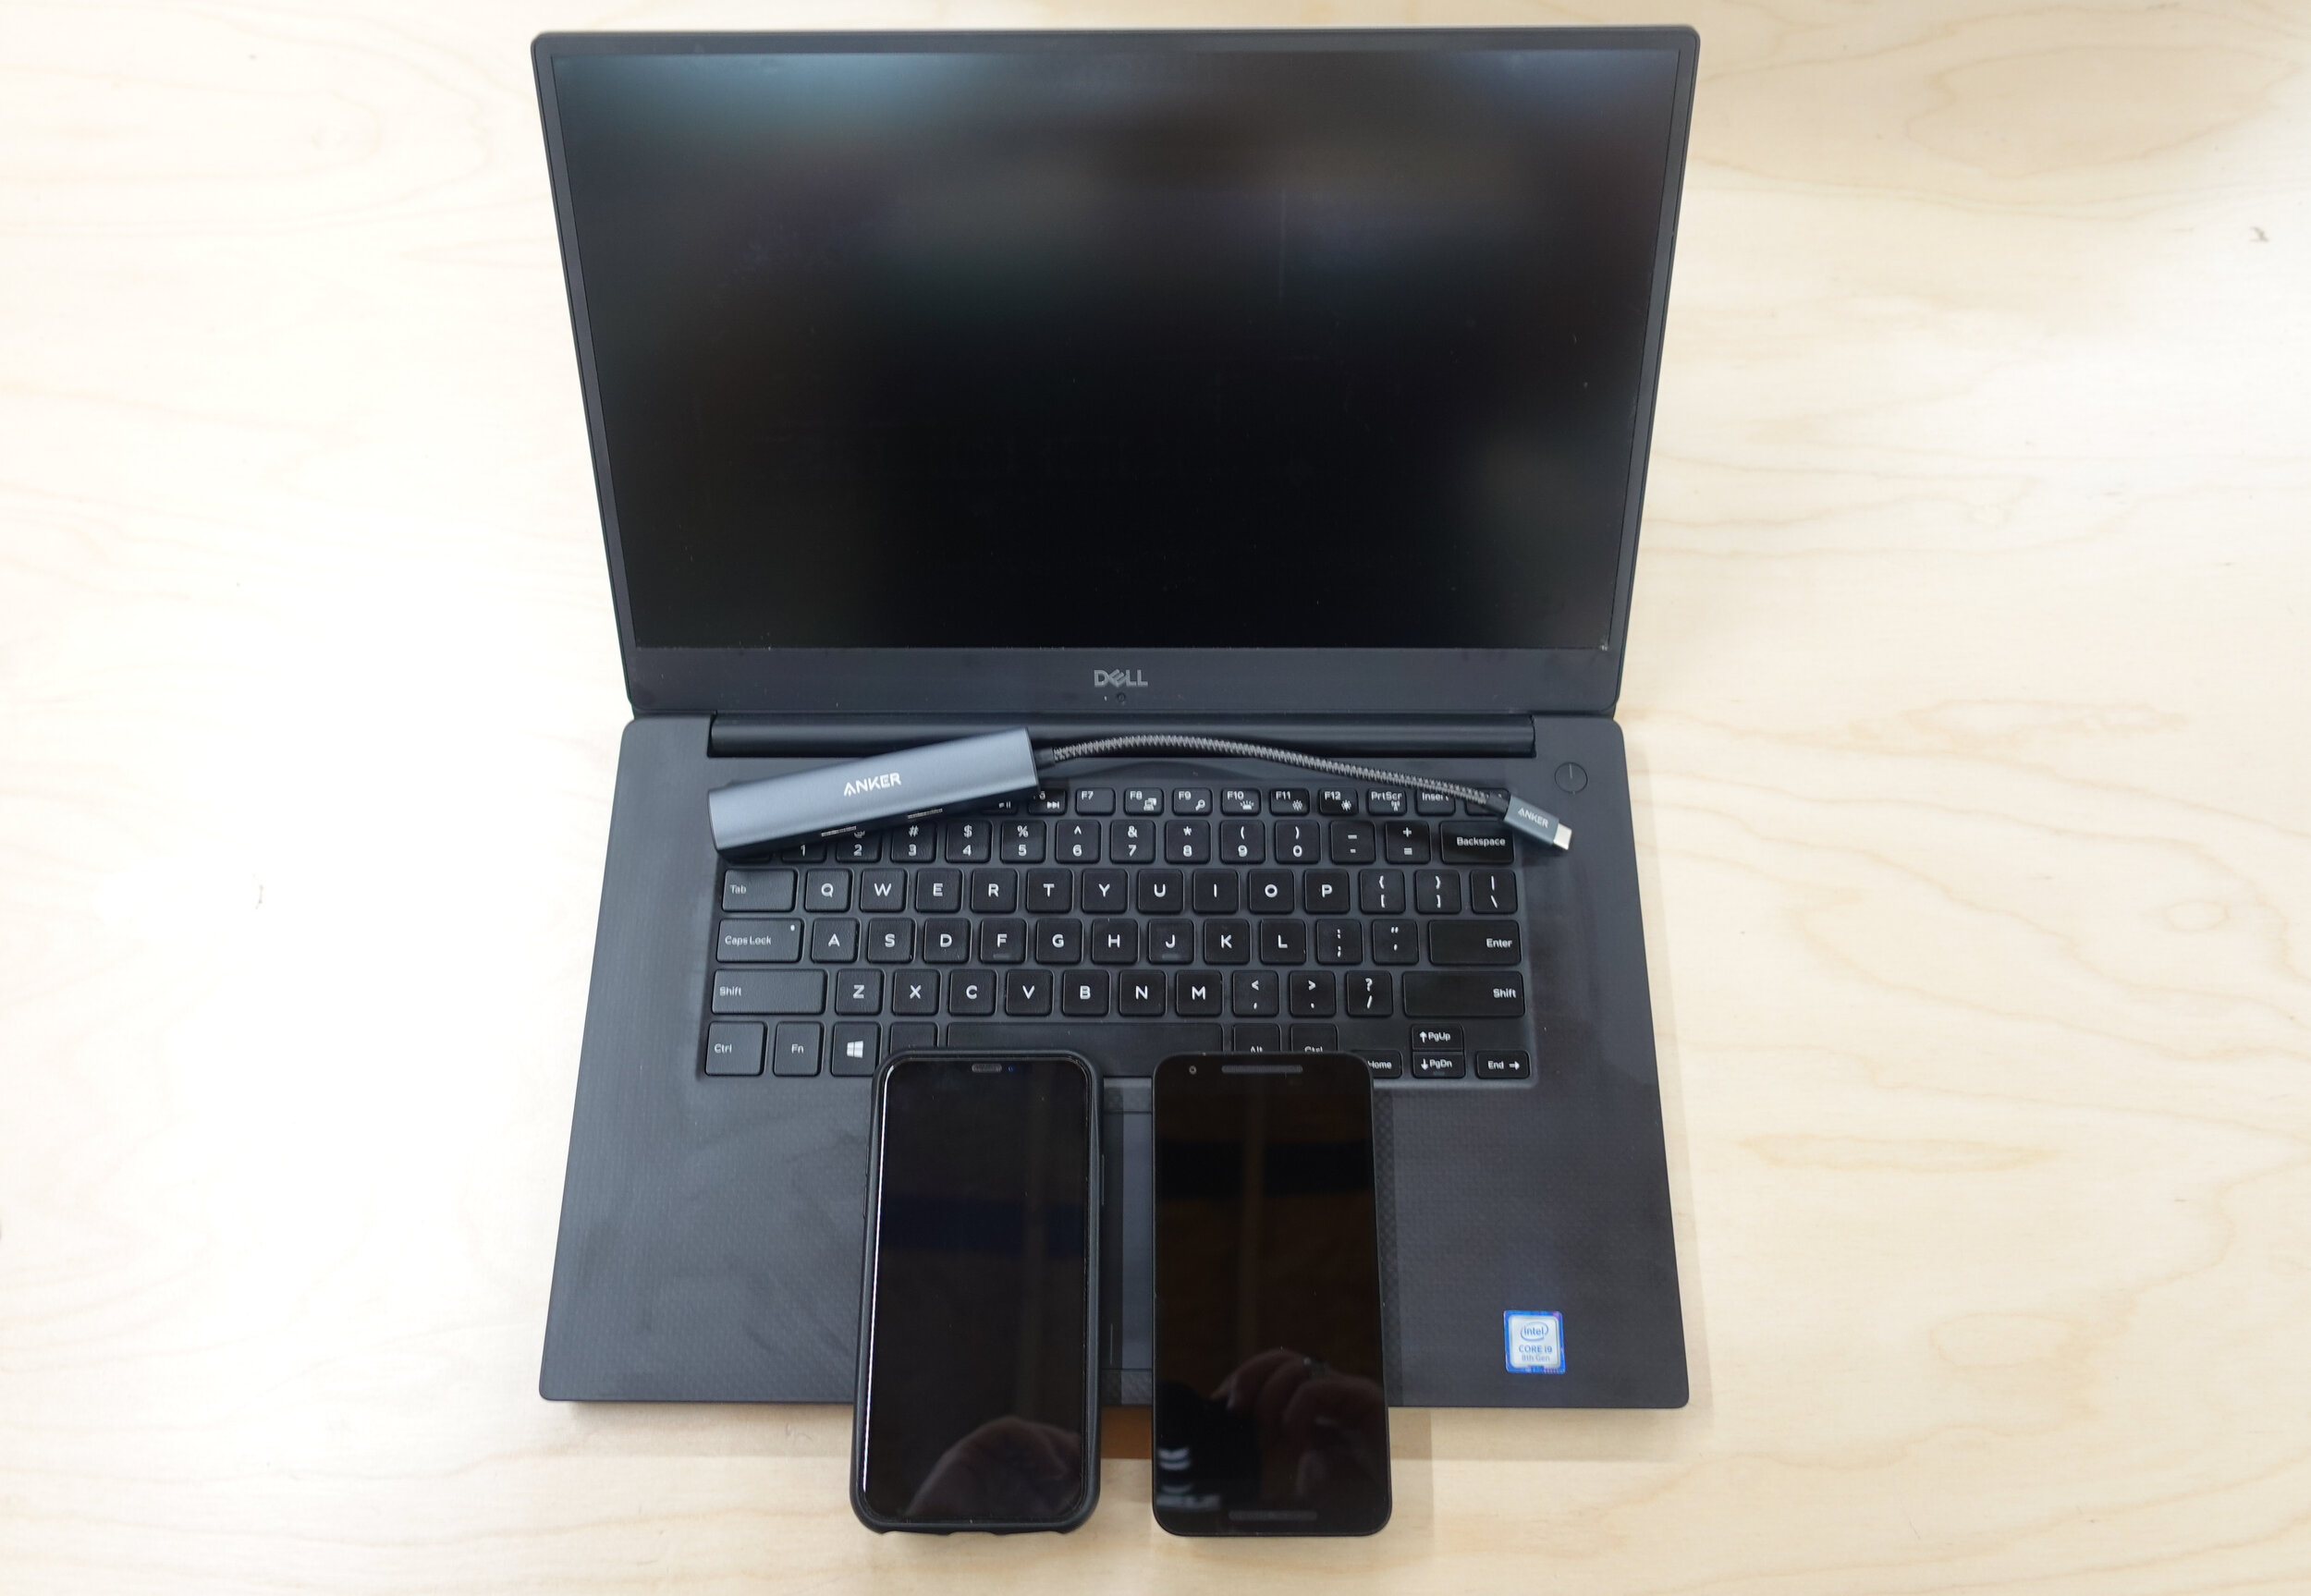
Figure 1. The setup.
In Figure 1 above, there are four items. Here is a description of each one:
Anker USB C Hub. This is definitely overkill, as this thing has 3 USB ports, a 4K HDMI port, and a 1Gbps Ethernet port. For our purposes here, any USB C Ethernet adapter should work.
iPhone X. This runs the latest iOS version, and is one of the primary devices I using for testing mobile apps.
Nexus 5. This is rather dated, but I do plan on upgrading fairly soon. This does not update to the latest Android version (only 8.1, which only supports security patches, not native Android app updates), but so far all mobile apps I’ve tested will still run on it.
Dell Precision 5530. This is one of my work computers, a Dell with Ubuntu pre-loaded, updated with Ubuntu 20.04. I’ve included it in this setup because it is fairly generic. I usually use my System76 Galago Pro which has built-in Ethernet. Any and all needed applications have been loaded on. Ubuntu on the Dell recognizes the Anker USB C hub automagically and even configured it upon plugging it in.
First we need to configure the laptop's wireless interface to operate as an ad-hoc “hotspot.” Follow your operating system's instructions for doing so, noting that no two operating systems (or different versions of the same operating system) are going to be the same. Here is how I did it.
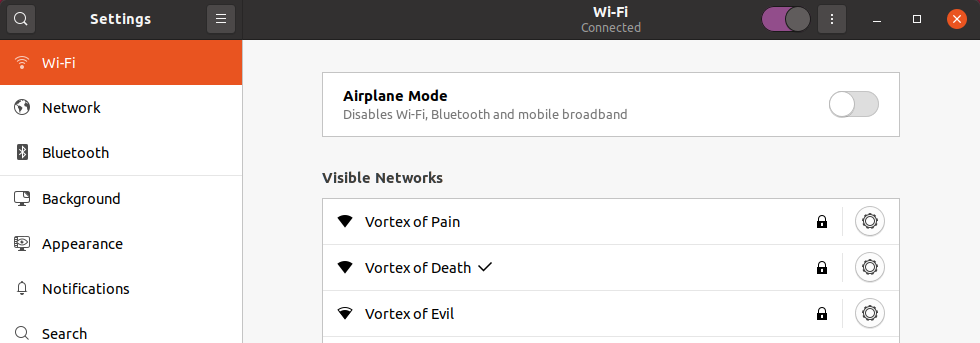
Figure 2. Wi-Fi settings.
Click on the icons in the upper right corner which displays a pull-down menu. Click on “Settings” and then select Wi-Fi in the upper left column of the Settings dialog box (see Figure 2).
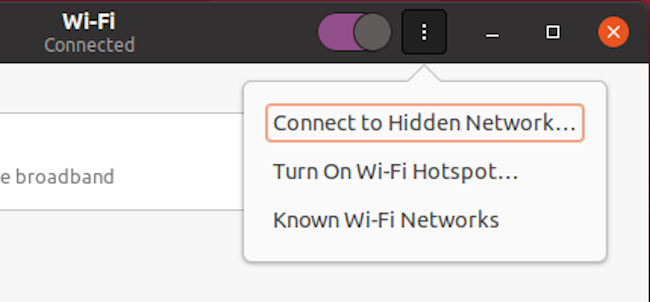
Figure 3. The three dots.
In the Wi-Fi settings, click on the three vertical dots (see Figure 3), and select “Turn On Wi-Fi Hotspot…” to bring up the dialog box to configure the hotspot.
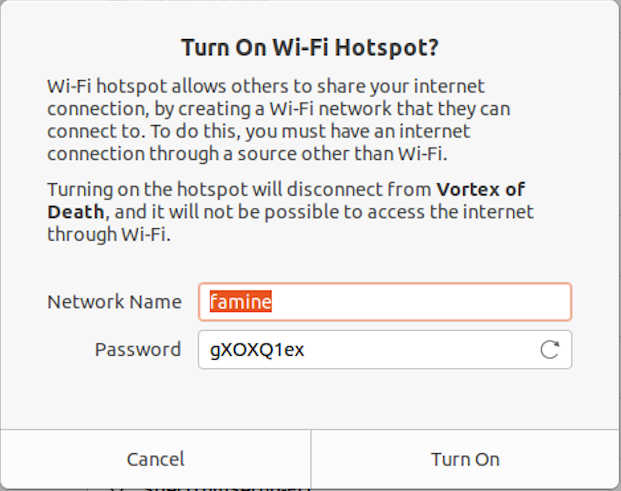
Figure 4. Configuring the Wi-Fi Hotspot.
The default Network Name is your computer’s hostname, and the Password is auto-generated (see Figure 4). You can edit both to suit your needs. Click on the “Turn On” button to activate it, and you are disconnected from any wireless network you were attached to.
In my setup there is a DHCP server on the Ethernet cable’s network, and that network goes to the Internet. I did not have to do any configuration for it at all, which has been fairly standard with all Ethernet dongles I’ve plugged into a laptop running Ubuntu. If that is not the case for you, you will need to configure your Ethernet side (select Network in Settings, refer to Figure 2).
By default the two interfaces do not pass traffic to each other. To ensure the traffic passes between interfaces, enter the following commands on the command line as root:
sysctl -w net.ipv4.ip_forward=1
sysctl -w net.ipv6.conf.all.forwarding=1
sysctl -w net.ipv4.conf.all.send_redirects=0
This will allow traffic coming from one interface to move to the other as needed.
Test time. Ensure the sniffing station itself can talk to the Internet while the wireless hotspot is running, which you can do by pulling up a browser or pinging a host on the Internet. Now take a phone or a second laptop and connect up to the hotspot, and try to access the Internet. If there are problems, go back over your steps, and do what I do if I encounter problems - google the hell out of it. Minor differences in operating system choices, and even specific versions of a particular Linux distribution can have an impact.
For example, I have tried to get this to work using a combination of the built in wireless and a USB wireless adapter, and have had no such luck. Using the USB Ethernet adapter and the built-in wireless with Ubuntu 20.04 on several laptops - including this particular Dell - works for me. YMMV.
Sniffing Time
I’ve used Wireshark for years. I highly recommend you load this up on the sniffing station and pick either interface to sniff from. This is how I’ve done research in the past, and to help verify results. If all you are doing is sniffing with Wireshark, it doesn’t matter which interface you’re sniffing on to get the traffic, although I typically sniff the wireless interface. This setup in itself is awesome. New laptops, new phones, even that new IoT device are fun to try out and see what they are really doing on the network - just make their initial network your hotspot and start sniffing away.
Taking the Next Step
Passive sniffing is one thing, but Wireshark can only take us so far. We need to use our laptop as a proxy that we can not just intercept traffic, but interact with it. I recommend you start playing with Burp Suite. There is a community version that will do some basic stuff, although the more serious hacker will most likely upgrade to Burp Suite Pro. Burp Suite’s strengths lie in manipulating and replaying web traffic that passes through it, and is an excellent bug hunting tool.
But the thing I really want to do is get to the actual traffic that is inside the encrypted stream of traffic. Both Burp Suite and Wireshark can do this, albeit in a limited way, but this is not the primary focus of either tool.
The best tool for the job as far as I am concerned is mitmproxy. Once loaded, it is fairly easy to use, after a bit of adjustment. In addition to the sysctl commands we entered in previously, you’ll need to adjust the firewall rules slightly to redirect the traffic for mitmproxy to intercept:
iptables -t nat -A PREROUTING -i <interface> -p tcp --dport 80 -j REDIRECT --to-port 8080
iptables -t nat -A PREROUTING -i <interface> -p tcp --dport 443 -j REDIRECT --to-port 8080
ip6tables -t nat -A PREROUTING -i <interface> -p tcp --dport 80 -j REDIRECT --to-port 8080
ip6tables -t nat -A PREROUTING -i <interface> -p tcp --dport 443 -j REDIRECT --to-port 8080
Make sure the interface you specify with the -i option is the ethernet interface - the one you’ll find with the ifconfig command. Now we are ready to launch mitmproxy. I set things up to save the certificates like so:
export MITMPROXY_SSLKEYLOGFILE="/home/mloveless/.mitmproxy/sslkeylogfile.txt”
And then you are ready to start mitmproxy (while running as root of course). Note that I usually save the session to a file using the -w option. You can use the -r option to read it back in later:
mitmproxy --mode transparent --showhost -w save-your-session
Since mitmproxy uses its own certificates to complete the “middle” part of MITM, you’ll need to ensure the devices you are connecting up to the hotspot will actually trust mitmproxy’s certificates. See the instructions at mitmproxy.org for more details on setting this up.
Things That Go Wrong
The main thing I’ve seen go wrong is when things simply stop working. You’ve fired up mitmproxy and no data is being captured even though it is clear that the device you attached to the hotspot can get to the Internet. Traffic does not pass between the interfaces. All networking ceases. You can imagine the different failure scenarios. The main thing I can tell you is take notes on how you set things up, and keep those notes updated as to what works, and when problems start simply reboot and carefully recreate the setup from your notes. My setup I’ve outlined works great, but occasionally it stops working - particularly after the laptop has gone to sleep. A reboot is simply the quickest way to reset things from scratch.
Sometimes it is weird things. My System76 was fine until Ubuntu 19.10, I have not investigated why, but I had to get the hotspot working via the command line (via nmcli). The upgrade to 20.04 corrected it. Weird. With the Dell I do remember some issues when it was first acquired, but again with 20.04 no issues.
A Word on Certificate Pinning
HTTPS uses certificates to help ensure trust between server and client. Certificate pinning is a method of ensuring that the server’s certificate presented to the client during the initial connection is in fact the legit thing. The server’s certificate is “pinned” for the client to validate. It is either the public key or the hash of the server’s cert that is pinned for the client to check. Once the client validates the certificate, the connection is considered good and the process of establishing the encrypted stream can continue.
There are two methods of pinning the server certificate. The first one is whatever certificate the server provides during the initial connection is the certificate that the client pins and verifies against. This is typically a CA that the client trusts. This is fairly secure. What mitmproxy does is intercept that initial request for a server certificate and provides its own, and the client checks this against a locally-stored set of certs that say “yes client, you can trust this certificate” so we can intercept and decrypt encrypted traffic.
The second method of pinning is a bit harder to deal with. In this scenario the application on the client has a copy of the hash of the server certificate (or even a copy of the public key itself) included in the app and the pinning is done against this local copy. This is a lot more secure, although if the server’s certificate expires then the app needs to be updated before it will trust future connections.
One does encounter the second method from time to time (more often in recent years). The method to bypass it typically involves downloading the Android version of the app in APK format, decompiling it, removing the certification pinning checks, recompiling and digitally signing it, and then using this altered version of the app to proceed with mitmproxy testing.
I bring this up because if you are dead set on getting to that decrypted traffic with mitmproxy, understand you are trying to get around security measures that are in place to prevent exactly what you are trying to do.
Some Rough Testing
I’ll typically test mobile apps with just sniffing via Wireshark to get a feel for the activity, try mitmproxy without the installed mitmproxy certificates being trusted on the phone just to see if they implemented certificate pinning correctly, and then trust those mitmproxy certificates on the phone and try mitmproxy again. Worse case scenario, I have to perform surgery on an APK to remove pinning checks before I can decrypt the encrypted traffic.
These steps can reveal a lot about the mobile app, and with some APK decompiling via apktool and exploring via JADX, you can pretty much learn everything you want to know about how an app works, at least on an Android phone. I repeat the same network interception steps for the iOS version - mainly to make sure that the traffic patterns match up - so I can see if the iOS version has more or less the same logic when talking on the network.
Conclusion
This is not intended as a complete MITM solution, but should at least get you started. I’ve had a draft of this blog post for well over a year, but as I do have some future blog posts that will cover mobile phone-related research topics, I thought going over my testing environment was worth it. I may also do a separate blog post on whatever phone I replace my Nexus 5 with, as I have a few ideas in that direction as well. Let me know if you have any questions!